Games console registration
Before continuing to Register your Console you will need the following information:
To register your console you will need the wired MAC address:
If you provide the MAC address of the WiFi adapter in your device, the connection will not work. MAC addresses are a series of 12 letters and numbers, sometimes separated by hyphens or colons, for example 48-2C-6A-1E-59-3D. Enter it into the form using only the letters and numbers – do not include the hyphens or colons, for example: 482C6A1E593D. See further instructions on how to find the MAC address for popular consoles below.
What happens next?
- If the details you provide are correct, we aim to connect your console within five working days.
- Once we’ve completed the connection, you will receive an email from us that states (in the subject line) “Case Resolved”. When you receive this email, your console should successfully connect to its online service.
Who can access this service?
Students in the following halls can request to connect a games console to the internet via a wired connection in your room:
- Chancellors Court
- Founders Court
- Graduates Court
- Palatine Court
- Woodland Court
- Main Halls
- Forest Court
Consoles can only be connected in these halls, but you can connect PCs, laptops and mobile devices via WiFi across campus.
Finding the MAC address for your console
How you find the MAC address for your console is different for each device, and can change with new updates. Typical instructions for a range of popular consoles are listed below.
Xbox 360
- Go to My Xbox in the Xbox Dashboard and select System Settings
- Click Network Settings, Configure Network
- From Additional Settings, select Advanced Settings.
- At the bottom of this screen you’ll see a heading called Wired MAC Address.
- This is the address you will need to register with IT Services
Xbox One
- Navigate to the Settings page
- Select Network
- Select Advanced Settings
- MAC address will be listed next to Wired MAC on the right hand side of the screen.
- This is the address you will need to register with IT Services
PlayStation 3
- Navigate to the Settings icon (located on the far left). Press ‘X’
- Navigate up/down until you see the System Settings icon. Press ‘X’
- Scroll up/down until you see System Information. Press ‘X’
- The MAC address will be displayed. It will consist of alphanumeric characters and have the format xx-xx-xx-xx-xx-xx.
- This is the address you will need to register with IT Services
PlayStation 4
- Arrow up and over to Settings in the PS4 menu.
- Scroll down to Network
- Scroll down to View Connection Status
- The 12 digit hex code will be listed next to MAC Address (LAN Cable)
- This is the address you will need to register with IT Services.
PlayStation 5
- From the home screen, select the gear icon (settings) in the upper right menu
- Select System
- Select Console Information
- Note the MAC address LAN Cable displayed at the bottom of the list
Wii
Nintendo consoles don’t have a wired (LAN) network socket, and so a LAN adapter must be purchased (from Argos, or Currys and others) before the console can be plugged in to the network.
- Go to the Wii options.
- Go to the Wii Settings
- Scroll over until you get to the Internet option
- Open up the Console Information
- There should be a 12 digit code (LAN Adapter MAC Address).
- This is the address you will need to register with IT Services.
Wii U
Nintendo consoles don’t have a wired (LAN) network socket, and so a LAN adapter must be purchased (from Argos, or Currys and others) before the console can be plugged in to the network.
- Go to system settings
- Tap on the internet button
- Select view MAC Address
- The MAC address you want is the LAN Adapter MAC address
- This is the address you will need to register with IT Services.
Nintendo Switch
Only the Nintendo Switch OLED Model has a built in WIRED LAN adapter built into the dock. Nintendo Switch and Lite consoles don’t have a wired (LAN) network socket, and so a LAN adapter must be purchased (from Argos, or Currys and others) before the console can be plugged in to the network.
- Go to System Settings
- Select Internet
- Select Internet settings
- Select Wired connection
- You’ll need the Lan Adapter MAC address
Restrictions on the wired internet connection
Please note that some network ‘ports’ may not be available (or ‘open’) – this is to ensure the security and integrity of the University network, and to prevent illegal and/or unauthorised activity such as peer-to-peer file sharing.
Register games console wired internet connection.
How To Connect
You have two ethernet sockets on the wall in your room, but only one of these is live.
You should plug your console into the live socket with a standard ethernet cable.
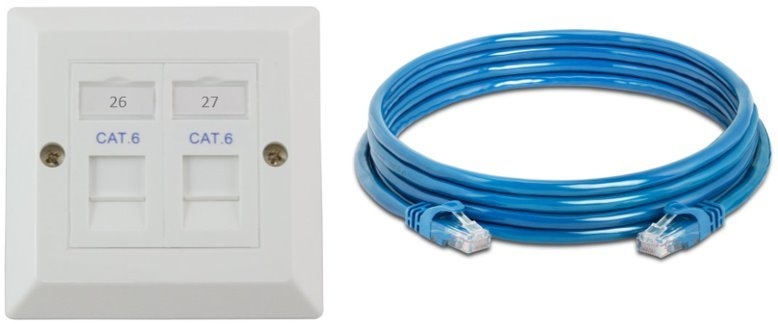
If you don’t have a cable, you can purchase one from Argos in Ormskirk or from Amazon or eBay.